Reviewed July 25, 2026
HVAC Rescue Editorial Team
Editorial StandardsHow do you know if your air ducts are leaking?
If some rooms stay dusty, upstairs bedrooms never seem to get enough airflow, utility bills feel high for the weather, or you hear whistling from ceilings or walls, duct leakage is a real possibility. Leaky ducts waste conditioned air before it reaches the rooms you paid to heat or cool. They can also pull hot, cold, dusty, or humid air from attics, crawl spaces, garages, and wall cavities into the system.
The key point is that duct leaks rarely show up as one dramatic failure. More often, they show up as comfort problems and higher operating cost. In many houses, the worst leaks are on return ducts in unconditioned spaces, where the system can suck in attic heat, insulation dust, or crawl-space air. Supply leaks matter too, especially if cooled or heated air is being dumped into an attic or basement instead of delivered to the rooms.
The most common signs homeowners notice
Dust is one of the biggest clues, but not in the way many people think. Duct leakage does not automatically mean the ducts need cleaning. If return ducts leak in an attic or crawl space, the system can pull in dusty air from those spaces and spread fine particles through the home. You may find that furniture gets dusty again quickly, or that certain rooms seem dirtier no matter how often you clean.
Weak airflow at far registers is another classic sign. Rooms at the end of long duct runs often suffer first because any leaks upstream reduce the air that makes it to those vents. You might also notice hotter upstairs rooms in summer, colder rooms over garages in winter, or a large temperature difference between rooms. Whistling or rushing sounds near boots, trunk lines, and returns can also point to gaps, disconnected sections, or poor fittings.
- Rooms farthest from the air handler often have the weakest airflow and the biggest temperature swings.
- Dusty rooms can mean return-side leaks are pulling in attic, crawl-space, or wall-cavity air rather than filtered indoor air.
- High summer humidity indoors can worsen if return leaks pull humid air into the system from unconditioned spaces.
- A very hot attic with visible flexible duct damage, loose connections, or sagging runs increases the odds of major leakage.
- Registers that barely move air even though the blower seems to run normally can point to leaks or disconnected ducts, not just a dirty filter.
What leaky ducts usually cost
The annual cost of duct leakage depends on climate, duct location, system size, and how severe the leaks are. In homes with ducts running through attics, crawl spaces, garages, or vented basements, leakage can add noticeable operating cost because lost air is escaping outside the conditioned envelope. Typical household energy waste from leaky ducts is often discussed as a meaningful percentage of heating and cooling use, but your actual dollar loss can vary a lot house to house.
Moderate duct leakage can add materially to annual heating and cooling expense, while severe leakage in hot attics or poorly sealed crawl spaces can waste even more. That operating loss is not a duct-repair project price and should not be replaced by one. The comfort penalty can matter just as much as the bill. If a bedroom never cools properly, occupants may lower the thermostat to compensate, which drives system runtime up even further. That means leaks can create both direct waste and indirect waste.
These numbers are estimates, not a guaranteed savings figure. A small, compact one-story house with ducts inside conditioned space may lose much less. A larger house with older flex ducts in a vented attic may lose more. The practical takeaway is simple: if the system is moving expensive conditioned air through unconditioned spaces, leakage is worth investigating because even modest leaks can keep showing up on every utility bill.
A quick check you can do before calling anyone
A homeowner can do a basic visual and comfort check without opening equipment or disturbing insulated ductwork. Start by noting which rooms are consistently uncomfortable and whether the issue changes by season. Compare airflow by holding a tissue or light strip of paper near supply registers with the fan running. You are not measuring exact airflow, only looking for obvious weak spots and large differences between nearby rooms.
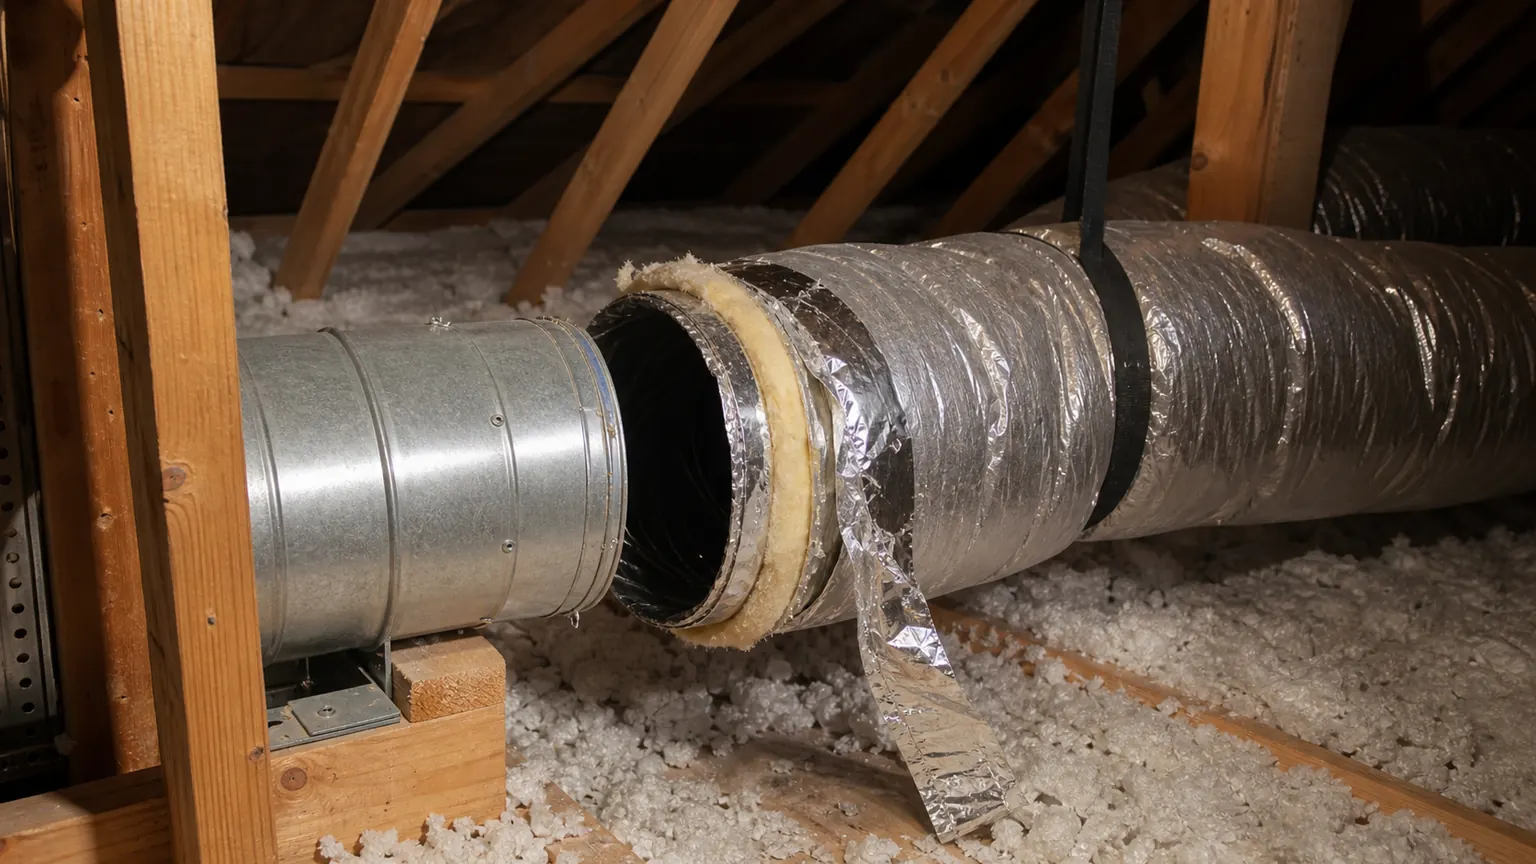
If you can safely access an unfinished basement, crawl space entrance, or attic walkway, look for obvious disconnected ducts, crushed flex duct, missing end caps, loose foil tape, separated boots, and black streaks around joints that suggest air movement. In attics, feel for strong blasts of conditioned air near connections while standing on safe framing or a proper walkway only. Do not step on drywall ceilings, and do not disturb electrical wiring or any gas venting.
How a blower-door or duct-blaster test works
If you want a real answer instead of guesswork, ask about diagnostic testing. A blower-door test uses a large calibrated fan mounted in an exterior doorway to depressurize or pressurize the house. Its main job is to measure the home’s overall air leakage, but it can also help reveal how duct leaks interact with the building shell. For example, pressure imbalances between rooms can hint at return problems, supply imbalances, or missing transfer paths.
A duct-blaster test is more specific. The contractor temporarily seals off supply and return registers, then connects a calibrated fan to the duct system to measure how much air leaks out at a set test pressure. That produces a leakage number, often reported as total leakage and sometimes leakage to outside. Leakage to outside matters most for energy waste because it tells you how much conditioned air is escaping from the home’s thermal boundary.
Typical 2025-2026 pricing for standalone residential duct leakage testing often lands around $200 to $500, depending on region, house size, and whether it is bundled with an energy audit or blower-door test. In some markets it may be higher. The value of testing is that it helps separate duct issues from other problems like undersized duct design, dirty evaporator coils, poor insulation, closed dampers, or a system that was never balanced correctly.
Cost ranges are estimates developed from standardized project scopes and reviewed pricing inputs. Government labor and regional cost data are used where applicable. See our Pricing Methodology for the exact sources, calculations, and review date. Actual prices vary by property, scope, materials or equipment, location, and provider.
What proper duct sealing actually involves
Good duct sealing is not the same thing as a quick sweep through the vents with a vacuum hose. Proper sealing means finding actual leakage points and closing them with the right materials. That usually includes resealing joints at the air handler, trunk lines, takeoffs, boots, return plenums, filter cabinets, and accessible branch connections. On flex duct, it may involve reconnecting loose inner liners, tightening drawbands, supporting sagging runs, or replacing damaged sections.
In many homes, the largest leaks are near the equipment: return plenums, air-handler cabinets, filter slots, and supply plenums. These areas can leak large volumes of air because they are under stronger pressure than remote branch lines. A thorough job may also include sealing around register boots where they meet ceilings, floors, or walls if those gaps are communicating with attics or wall cavities. After sealing, some contractors retest to confirm improvement.
- Mastic is the standard brush-on or trowel-on sealant for many metal duct joints and fittings.
- UL-listed foil tape can be appropriate on clean, dry surfaces when used as part of a proper sealing method.
- Mechanical fastening matters because tape or mastic alone should not hold together a loose duct connection.
- Damaged, crushed, or badly installed flex duct often needs correction or replacement, not just surface sealing.
- A good sealing scope focuses on accessible leaks and delivery problems, not on selling unrelated extras.
The standardized whole-house manual duct-sealing scenario used by this site ranges from about $1,050 to $4,150 for accessible manual work, with the active pricing table supplying the current canonical range. Higher totals are possible if sections need replacement, access is difficult, or the system is large and spread out. Aeroseal-style internal sealing is a separate scenario and may make sense where many leaks are hidden behind finished surfaces. No method is automatically best; the right choice depends on where the leaks are and what is actually accessible.
Duct sealing versus duct cleaning upsells
Homeowners often get steered toward duct cleaning when the real problem is leakage. These are different services. Duct cleaning removes dust and debris from inside accessible duct surfaces. Duct sealing reduces air loss and unwanted air infiltration. If your main symptoms are weak airflow, high bills, room imbalance, attic dust, and whistling, sealing is usually the more relevant conversation. Cleaning may have a place in specific situations, but it does not close gaps or reconnect loose ducts.
That does not mean cleaning is never appropriate. It can make sense after major renovation dust, visible debris in ducts, or contamination from pests or water damage. But it should not be sold as the cure for every comfort problem. If a contractor cannot show where the leakage is, explain how it was verified, or distinguish sealing from cleaning, that is a sign to slow down and ask sharper questions.
A useful conversation with a contractor sounds like this: Where are the biggest leaks? Are they on the supply side, return side, or at the equipment cabinet? How much leakage showed up on testing, if any? What materials will be used? What parts are accessible, and what parts are not? Will airflow or leakage be retested afterward? Those questions help you judge whether the recommendation is a repair plan or just an upsell.
Sources and fact-checking
Reviewed July 25, 2026. We favor primary government and standards sources for safety, efficiency, and regulatory claims. These references support the technical and consumer guidance on this page.